My Dev Setup: Split Keyboards, Single Monitors, and Terminal Everything
A deep dive into the hardware, window management, terminal workflow, and tools I use daily. Built around a single laptop display, a Corne split keyboard, and a mostly-keyboard-driven macOS setup.
I get asked about my setup a lot. Usually after someone sees the split keyboard or watches me jump between workspaces without touching a mouse. So here it is — the full breakdown of my hardware, workflow, terminal, and the glue that holds it all together.
I know people in this space love to talk about efficiency gains and optimal workflows. I’ll be honest — that’s not really why I do this. I just find it fun. Tinkering with my setup, trying new tools, swapping hardware, breaking things and rebuilding them. I’m constantly experimenting. The productivity boost is real, but it’s the bonus, not the motivation. The motivation is that this stuff is genuinely enjoyable.
Hardware
The keyboard: Corne split
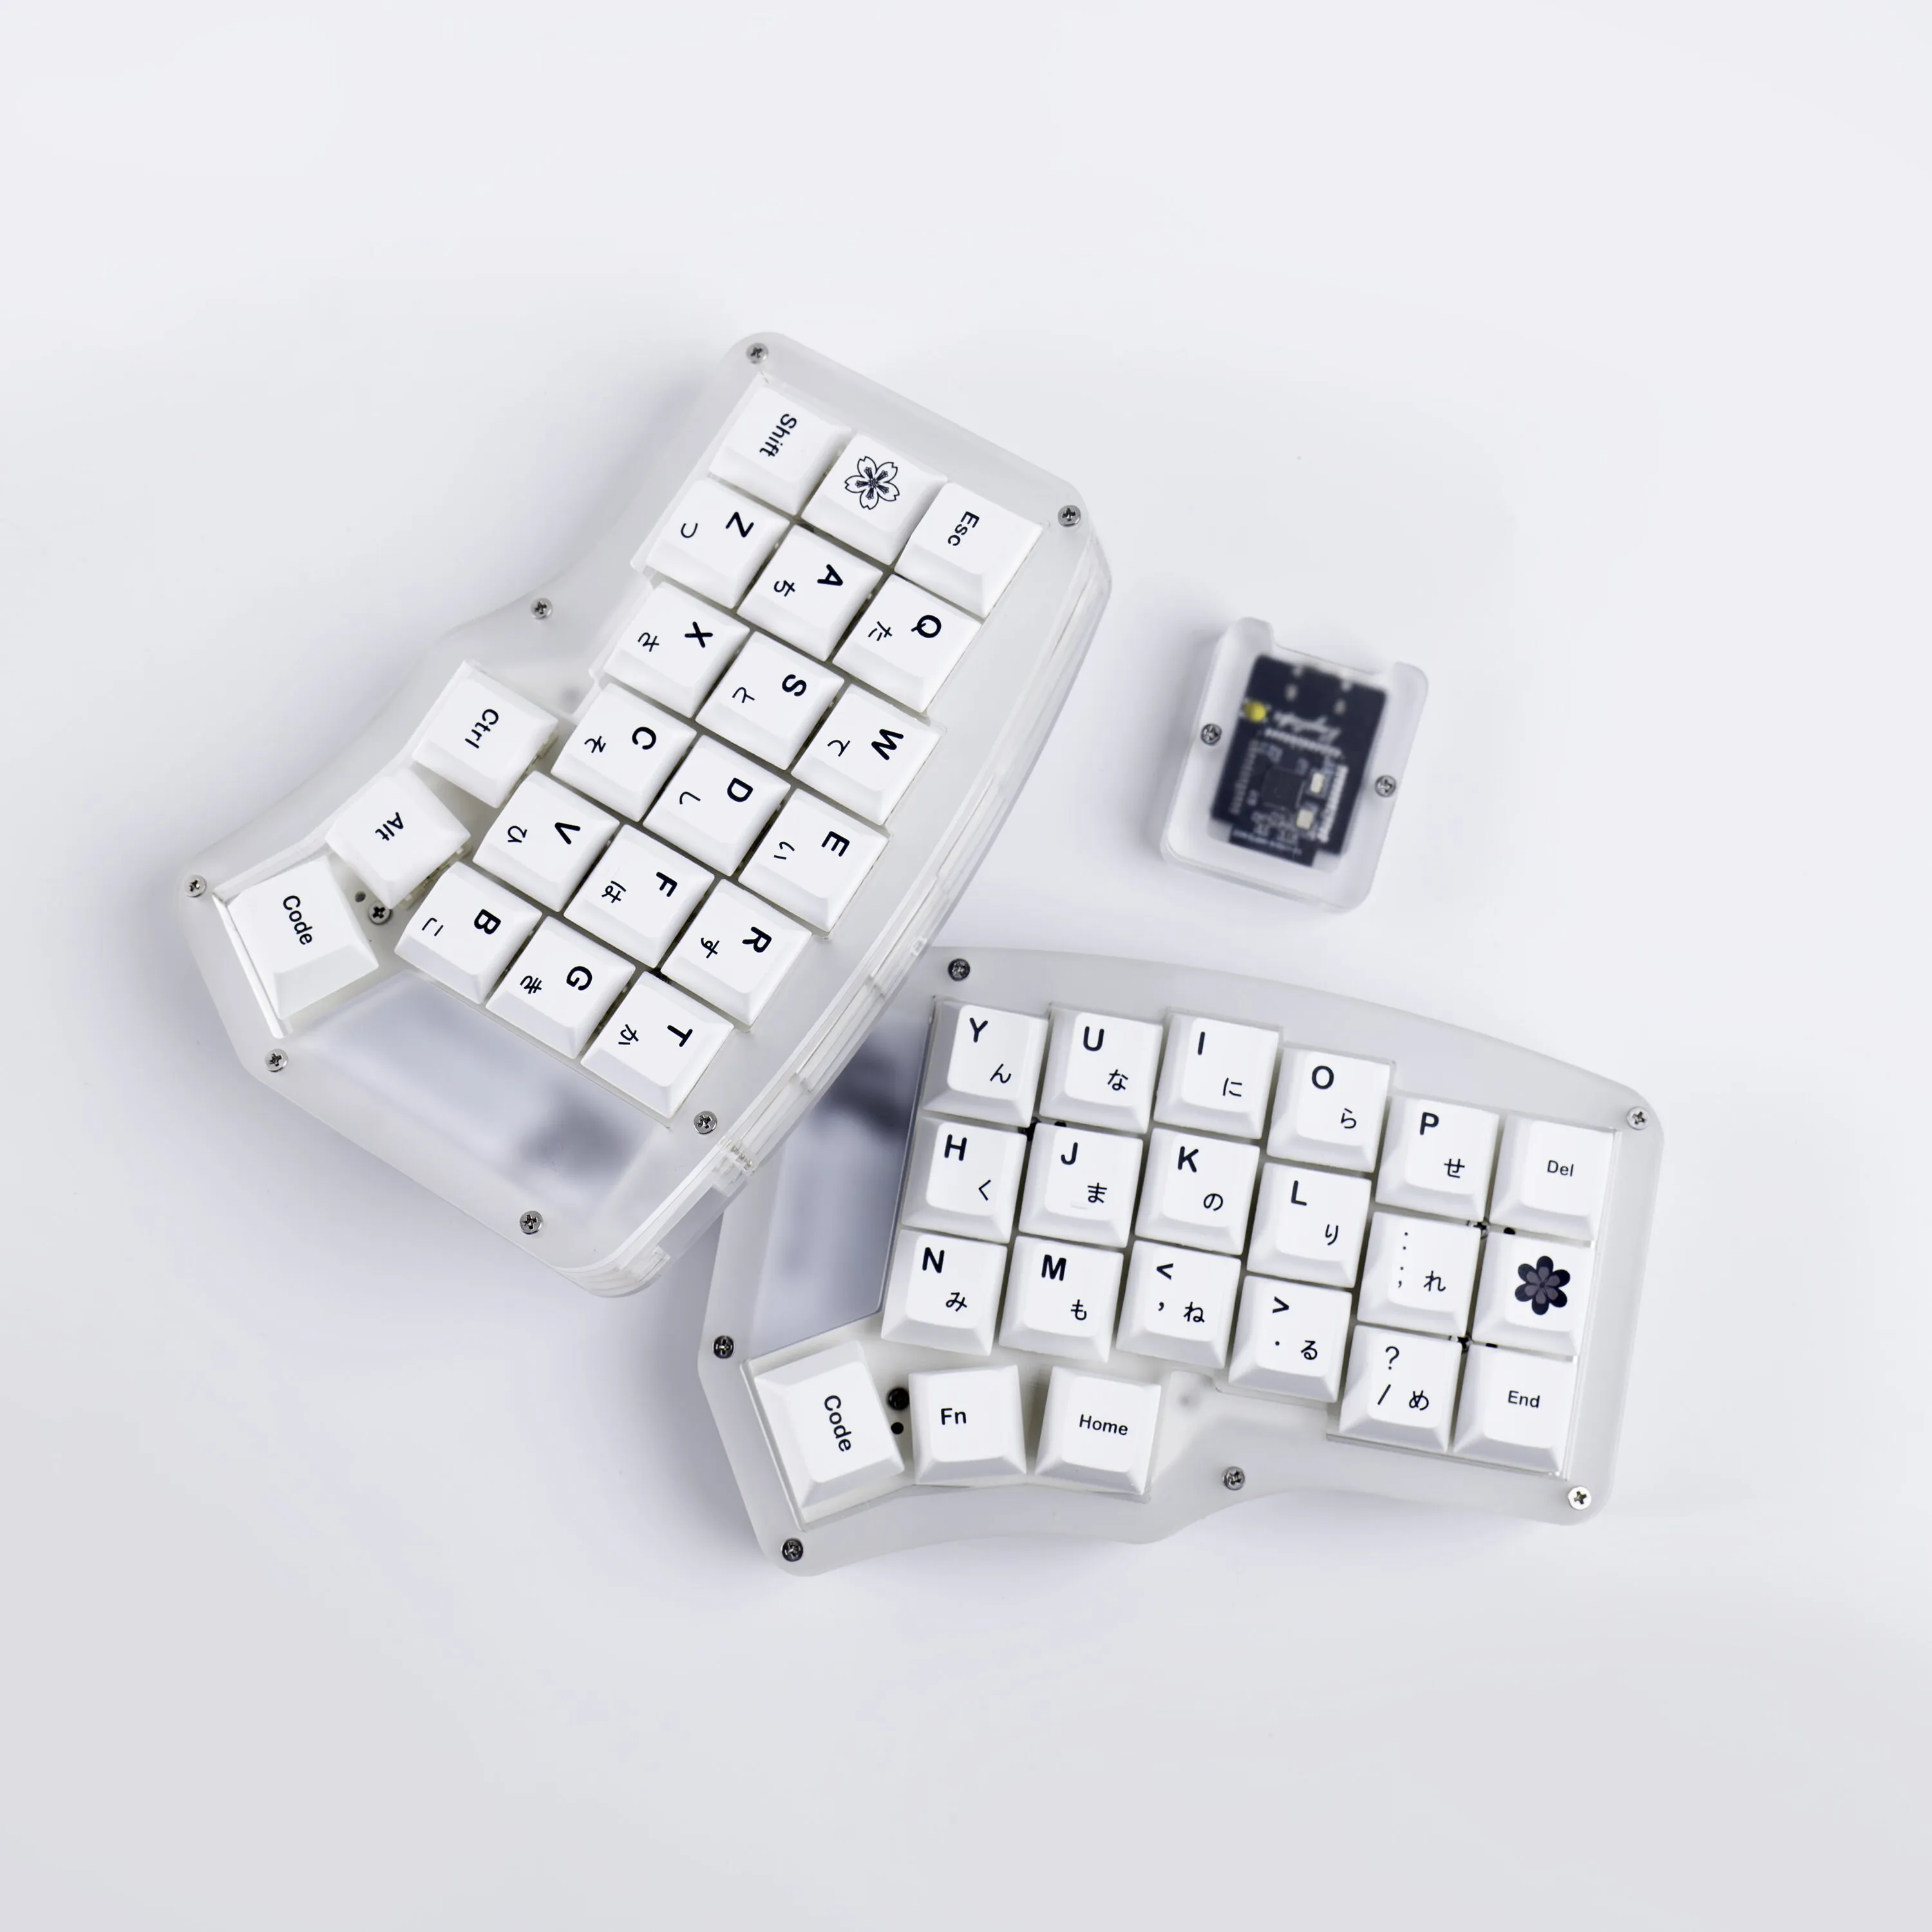
The Corne is a 42-key split ergonomic keyboard, and it’s probably the single biggest quality-of-life improvement in my setup. Going split means your shoulders aren’t caving inward all day. Going small (42 keys) means your fingers never leave the home row — everything lives on layers.
The learning curve was steep — made steeper by the fact that I decided to learn the split layout and Vim at the same time. Double the muscle memory rewiring, double the frustration. But it paid off in ways I didn’t expect. I was never a particularly fast typist despite using computers most of my life. I’d just never put the deliberate time in. Before the Corne I was sitting around 60 WPM. Going through the pain of relearning from scratch forced me to actually develop proper technique. Now I’m consistently hitting 100 WPM, even on regular keyboards.
I won’t go deep into my keymap here — that deserves its own post — but the gist is: a base alpha layer, a numbers/symbols layer on a thumb hold, and a navigation layer that gives me arrow keys, home/end, and page up/down without leaving home row. The efficiency compounds. Every keystroke you save across thousands of repetitions per day adds up.
Pointing devices: Magic Trackpad + MX Master
The MX Master 3 has been my daily driver for a while now and it’s a solid mouse. Recently I picked up an Apple Magic Trackpad and I’ve been really liking it. I’m still fine-tuning how it fits into the setup — where it sits, which gestures I rely on — but it shines for specific tasks like diagramming software and design work where gestures feel more natural than a mouse.
That said, despite having two pointing devices on my desk, I actually strive to use them as little as possible. Between yabai, skhd, and the tools I’ll cover below, almost everything is keyboard-driven. The pointing device is a fallback, not the primary input.
The laptop: MacBook Pro M4 Pro
I’m on a MacBook Pro M4 Pro. At work I often connect to a larger main monitor, but my personal workflow is built around a single display.
When I first started out I used the traditional dual monitor setup — laptop screen plus an external. It didn’t take long before I started getting neck pain from constantly turning between screens. That’s what pushed me to start exploring a keyboard-focused setup and the workspace-based workflow I use now. Tools like Aerospace and yabai made a single screen not just tolerable but genuinely better. No more neck strain, no more scattered attention. Every app gets the full display or it’s not visible, and that constraint drives the entire window management philosophy I’ll cover next.
Workflow: yabai + sketchybar on a single display
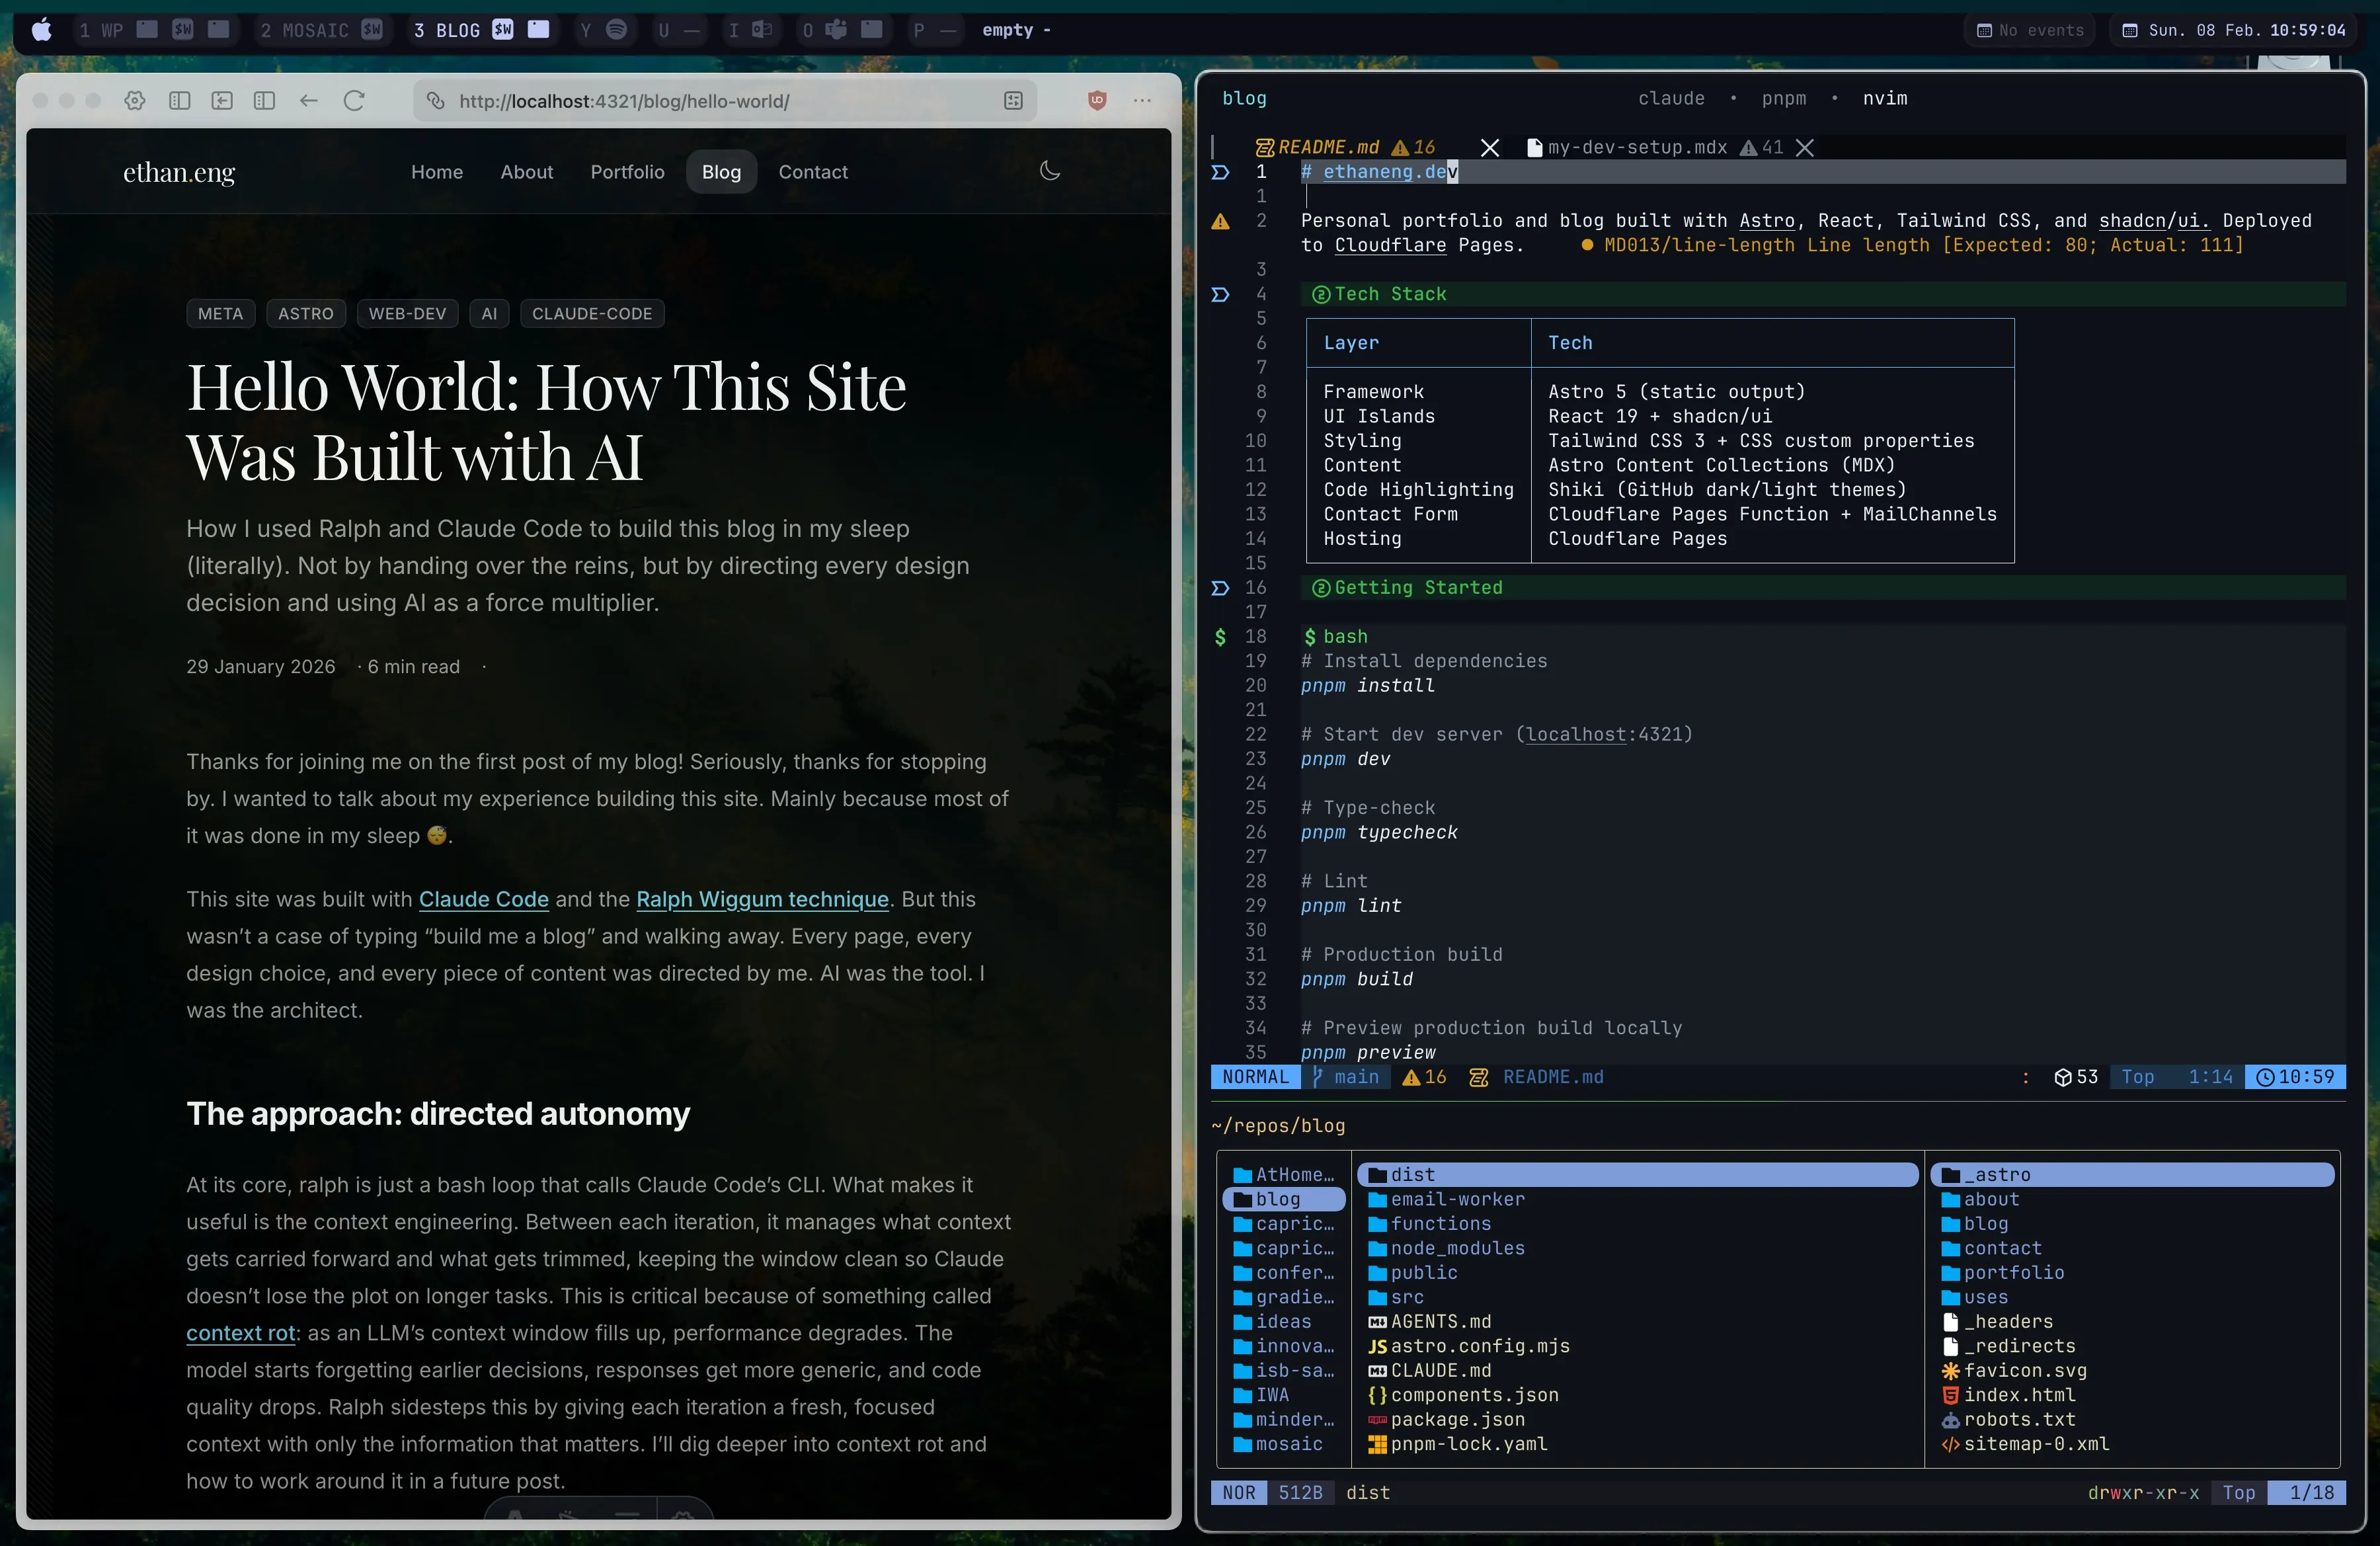
This is where the setup gets opinionated. Running a tiling window manager on macOS with a single laptop display sounds extreme, but it’s genuinely the most productive window management system I’ve used.
yabai: tiling window management
I’ve tried a few different window managers at this point — my main two being Aerospace and yabai, which I’m currently on. Both are solid, but the core of my workflow is the same regardless of which one I’m running: a workspace-based system.
The idea is simple. Instead of a mess of overlapping windows on a single desktop, I have discrete spaces, each with its own set of windows and purpose. As a consultant who’s constantly working across different projects at once, this is essential. I can have a full terminal setup on one workspace, a browser with docs on another, comms on a third, and jump between them with a single keybinding. No more alt-tabbing through a pile of fifteen windows trying to find the right one. No more dragging things around and resizing. Everything is one click away.
Having set bindings to open specific windows or jump to specific workspaces is a massive productivity boost. I’ve mapped the most common actions to muscle memory — switching to my terminal workspace, opening a browser, jumping to comms — so context switching is near-instant.
sketchybar: a custom status bar

sketchybar goes hand in hand with yabai. It replaces the macOS menu bar with something that actually surfaces useful information about the workspace system. Mine shows which workspaces are active and what windows are in each, along with the usual battery, time, and system info. At a glance I know exactly where I am and what’s running.
I’ve even got a custom script via Raycast that lets me rename spaces on the fly — so when I spin up a new project context, I can label the workspace and keep things organised without breaking flow. Combined with yabai, sketchybar makes the single-monitor workflow feel like a multi-monitor setup without the physical displays.
Terminal: neovim + tmux + sesh
The terminal is where I spend most of my time, so it needs to be fast and get out of the way.
tmux + sesh: session management
tmux is the session multiplexer, and sesh is the layer on top that makes session management actually pleasant. sesh lets me fuzzy-find and switch between tmux sessions by project. Every project gets its own session with its own window layout, and I can jump between them instantly.
The workflow looks like this: I hit a keybinding, a fuzzy finder pops up with all my sessions and directories, I pick one, and I’m there. If the session doesn’t exist yet, sesh creates it. If it does, it attaches. No manual tmux commands, no remembering session names. It just works.
This is critical for context switching. When I need to jump from the blog to a client project, it’s one keystroke to get a completely different terminal layout with the right files already open.
neovim: the editor
Neovim is the editor. I’ve been down the VS Code road and back, and for my workflow — terminal-centric, keyboard-driven, heavily customised — Neovim is the right fit. The startup time is near-instant, the plugin ecosystem is mature, and the modal editing model clicks once you’ve committed to it.
I won’t list every plugin (my config is its own rabbit hole), but the essentials are telescope for fuzzy finding, treesitter for syntax, LSP for language intelligence, and oil.nvim for file navigation. The theme rotates between GitHub Dark and Ayu Dark depending on the time of day and my mood.
For AI-assisted coding, I use Claude Code and opencode directly in the terminal alongside neovim. Having the AI tool live in the same tmux session as the editor means I can see changes in real time without switching contexts.
Other tools: the glue
The hardware and terminal setup only works this smoothly because of a few Mac apps that tie everything together.
Leader Key
Leader Key brings Vim-style leader key sequences to macOS. Press a trigger key and a popup shows available actions — launch apps, trigger scripts, open URLs. It’s like having a keyboard-driven command palette for your entire operating system.
I use it as the entry point for anything that isn’t a direct skhd keybinding. Quick-launch apps, open specific projects, trigger automations. The mnemonic key sequences mean I rarely forget bindings because they’re structured logically (l for launch, p for project, etc).
Raycast
Raycast handles everything else — clipboard history, snippets, calculations, quick actions. It replaced Spotlight and Alfred for me. The extension ecosystem is solid and the search is fast.
The overlap with Leader Key is minimal. Leader Key is for structured, repeatable actions I’ve deliberately mapped. Raycast is for ad-hoc search and one-off commands. They complement each other.
Monocle
Monocle is a browser picker that intercepts link clicks and lets you choose which browser or profile opens the URL. When you’re managing work and personal contexts across different browsers, this is essential. Links from Slack open in the right browser profile without thinking about it.
Small tool, surprisingly high impact.
The philosophy
Looking at all of this together, the common thread is removing decisions from the moment. The keyboard layout means I don’t decide where to reach. yabai means I don’t decide where windows go. sesh means I don’t decide how to get to a project. Leader Key means I don’t decide how to launch something.
Every tool here automates away a micro-decision that would otherwise compound across a full day of work. None of them are essential — you can write great software with a default macOS setup and VS Code. But if you enjoy the process of optimising your environment, and you’re willing to invest the upfront time to learn these tools, the payoff in daily flow is significant.
I’ll do deeper dives into individual pieces — the Corne keymap, my neovim config, the yabai + sketchybar setup — in future posts. For now, this is the lay of the land.